Virtual Home Setup Lab for Cybersecurity - Part 3: Basic pfSense Configuration
Part 3 - Basic pfSense Configuration

Overview
In this part, I’ll cover installing pfSense, and configuring our initial 3 interfaces: LAN, CYBER & AD (Active Directory). The next part will go over setting rules on the firewall via the management interface.
pfSense Installation
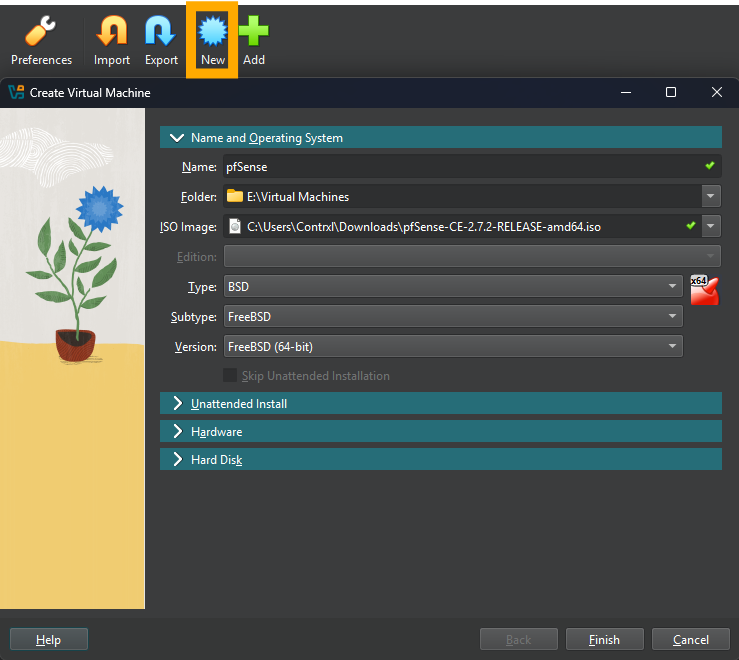
If you haven’t already, download the latest version of pfSense from the mirror here. For the VM setup, choose “New” and select the ISO you downloaded. Make sure the “Type”, “Subtype” and “Version” match the screenshot. Select “Hard Disk” and change the size to 20GB. Leave all other settings as they are.
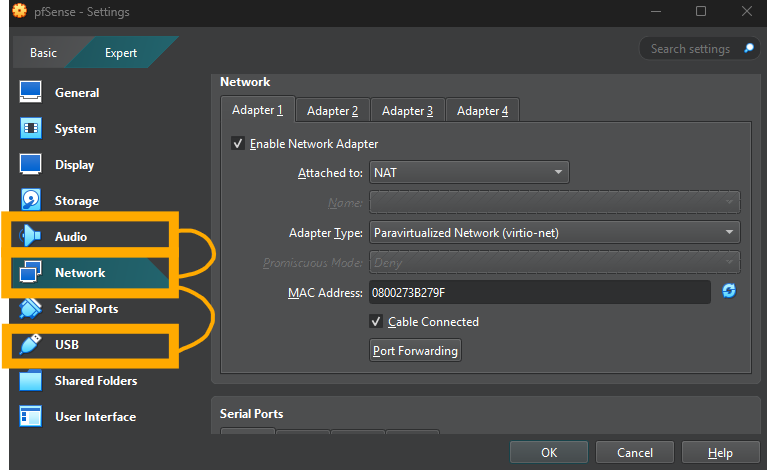
Once the VM is created, select it and then “Settings”. Select “Audio” and uncheck “Enable Audio”, next, select “USB” and uncheck “Enable USB Controller”. This VM will not need these functions. Next, select “Network” and change the “Adapter Type” to “Paravirtualized Network (virtio-net)”.
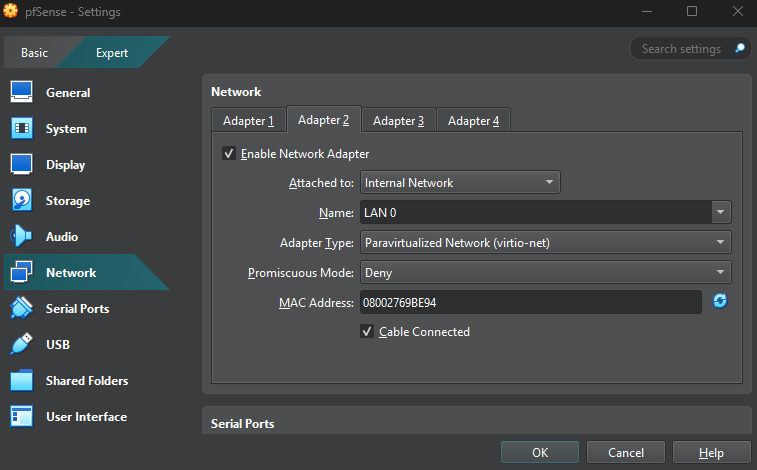
Now, go through “Adapter 2”, “Adapter 3”, and “Adapter 4”, configuring them as below, and naming them “LAN 0”, “LAN 1” and “LAN 2” respectively. Make sure all “Adapter Type”s are “Paravirtualized Network (virtio-net)”!
Finally, select “System”, then “Motherboard” and make sure the boot options mirror the screenshot. You will take this action for most VMs we create.

Press “OK” to confirm the settings, and then “Start” to boot up the VM.
pfSense System Setup
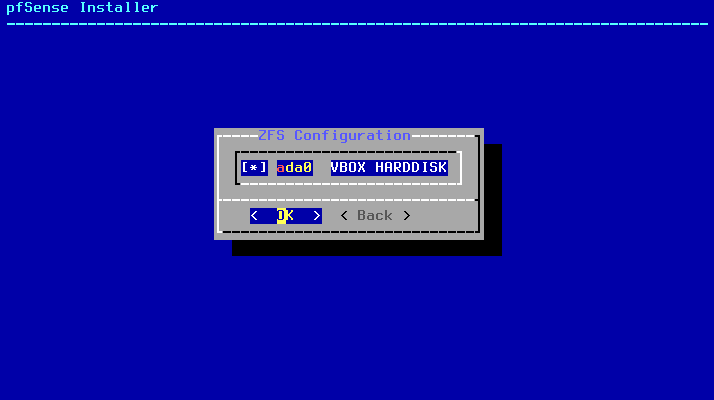
As with Kali, I won’t go over every single step of setup, as its mostly follow-along instructions. When the firewall boots, you will be presented a “Copyright and Distribution Notice” - simply hit “Enter” to accept this. Next, press “Enter” on the default, which is “Install pfSense”. Continue pressing “Enter” to accept defaults until you get to “ZFS Configuration”. Here, press “Space” to select the “VBOX HARDISK” and then enter to proceed.
On the next screen, press the left arrow key and then hit “Enter” to choose “Yes”. Once the install is complete, press “Enter” again to reboot the system.
When the machine reboots, you will be presented with a console asking you if you would like to setup VLANs, type “n” and press “Enter”.

Next, define names for each interface. Define the interface names as below, then type “y” and hit “Enter” to proceed.
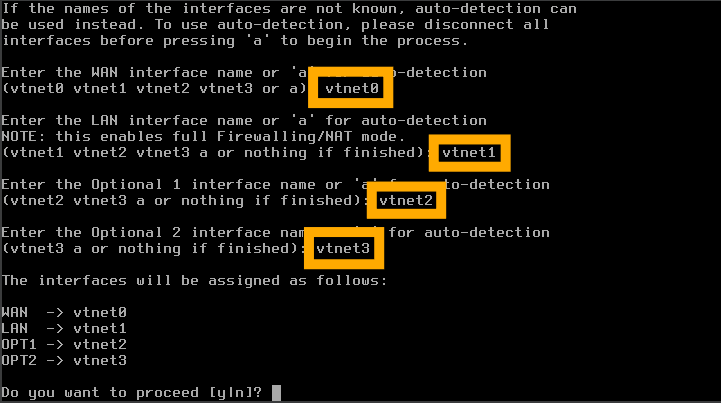
Now, we need to configure the interfaces. The WAN interface will already be assigned - this is managed by VirtualBox. We will configure static addresses on the other three interfaces.
LAN
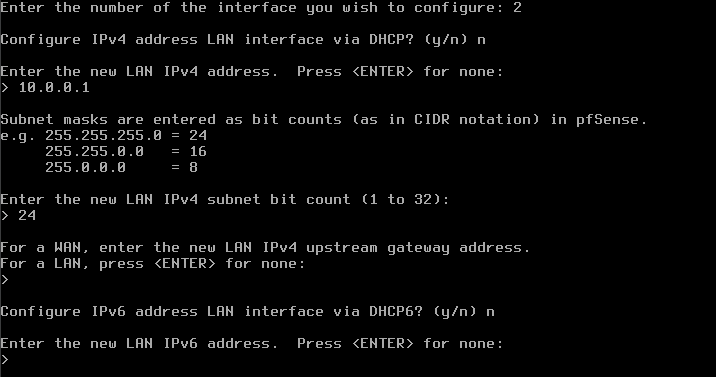
To select the LAN interface, select option “2”, and then option “2” again. Configure the interface as follows. For blank options, simply press “Enter” to skip.
Configure IPv4 Address LAN Interface via DHCP?: n
Enter the New LAN IPv4 Address: 10.0.0.1
Enter the New LAN IPv4 Subnet Bit Count: 24
Press “Enter” for none
Configure IPv6 Address LAN Interface via DHCP6?: n
Press “Enter” for none
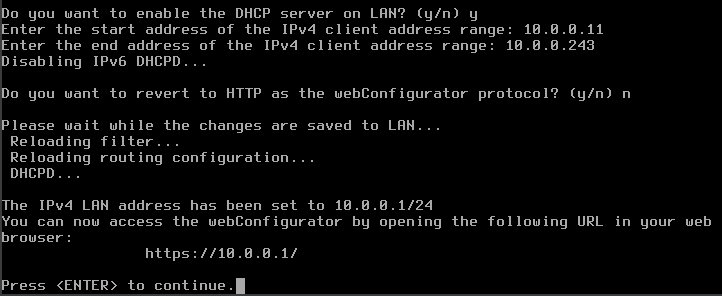
Do You Want to Enable the DHCP Server on LAN?: y
Enter the Start Address of the IPv4 Client Address Range: 10.0.0.11
Enter the End Address of the IPv4 Client Address Range: 10.0.0.243
Do You Want to Revert to HTTP as the webConfigurator Protocol?: n
OPT1
To select the OPT1 interface, select option “2”, and then option “3”. Configure the interface as follows. For blank options, simply press “Enter” to skip.
Configure IPv4 Address LAN Interface via DHCP?: n
Enter the New LAN IPv4 Address: 10.6.6.1
Enter the New LAN IPv4 Subnet Bit Count: 24
Press “Enter” for none
Configure IPv6 Address LAN Interface via DHCP6?: n
Press “Enter” for none
Do You Want to Enable the DHCP Server on LAN?: y
Enter the Start Address of the IPv4 Client Address Range: 10.6.6.11
Enter the End Address of the IPv4 Client Address Range: 10.6.6.243
Do You Want to Revert to HTTP as the webConfigurator Protocol?: n
OPT2
To select the OPT1 interface, select option “2”, and then option “3”. Configure the interface as follows. For blank options, simply press “Enter” to skip.
Configure IPv4 Address LAN Interface via DHCP?: n
Enter the New LAN IPv4 Address: 10.80.80.1
Enter the New LAN IPv4 Subnet Bit Count: 24
Press “Enter” for none
Configure IPv6 Address LAN Interface via DHCP6?: n
Press “Enter” for none
Do You Want to Enable the DHCP Server on LAN?: n
Do You Want to Revert to HTTP as the webConfigurator Protocol?: n
Finalising
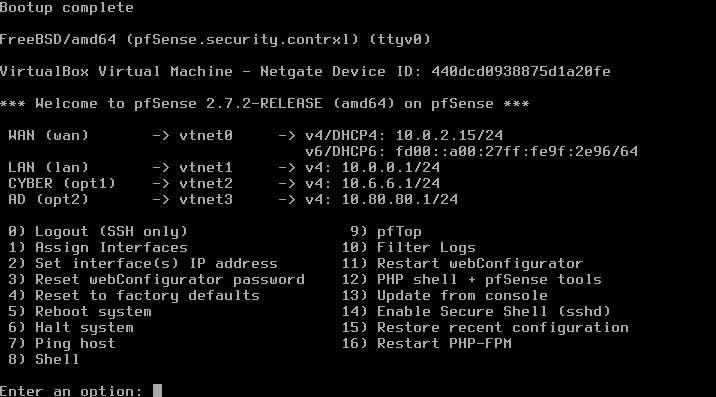
Once complete, power down the machine by entering “6” on the main screen, typing “y” and pressing “Enter”. This is how to safely power down the machine. The firewall should always be first on and last off when running the environment. At final setup, your pfSense screen should appear something like the below.
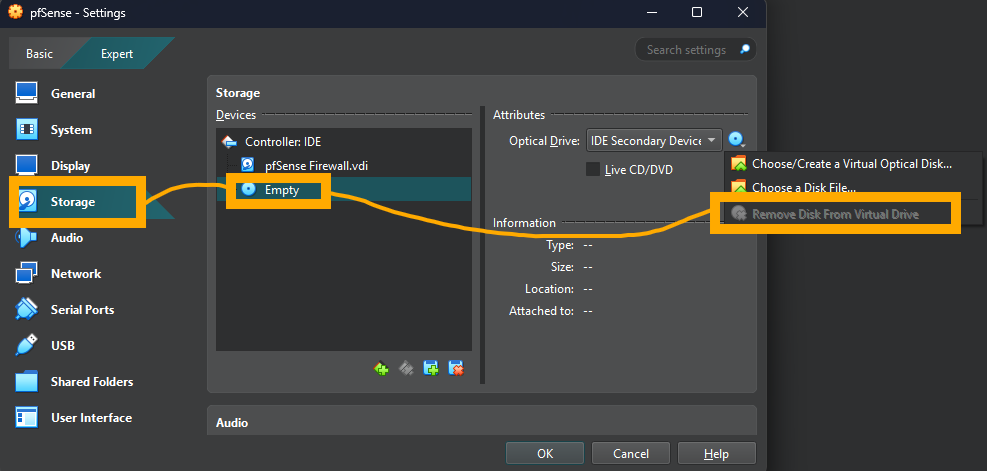
You can now also safely remove the pfSense disk by selecting the pfSense VM, choosing “Settings”, then “Storage” and clicking on the pfSense disk. On the right you will see a small disk icon, clicking this will show you an option to “Remove Disk from Virtual Drive” (it shows ‘Empty’ on my screenshot, I took out the disk before taking the screenshot, oops). Once this is done, you can safely delete the pfSense ISO files you had saved, they will not be needed again. Next, we will go over setting up the firewall rules using the Kali machine for our first two subnets.