
Virtual Home Lab Setup for Cybersecurity - Part 2: Setup Kali Management Device
Part 2 - Setup and Configuration of Kali Linux Management Device

Overview
In this part, we are going to setup the Kali Linux management machine using the ISO you downloaded in part one. Typically, I would set the firewall up first and then move on to enabling the management device, but it makes more sense writing to setup the management machine first, then do the firewall. Make sure you have VirtualBox running, and the Kali Linux ISO downloaded.
Kali Linux Installation
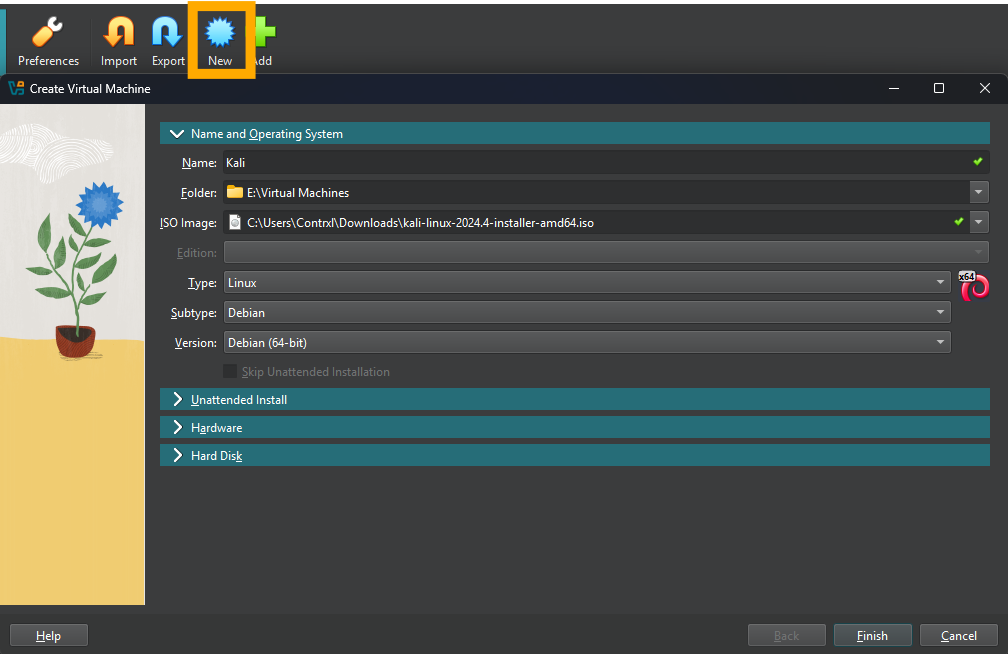
In VirtualBox, choose “New” on the main page, and enter the following details for your VM:
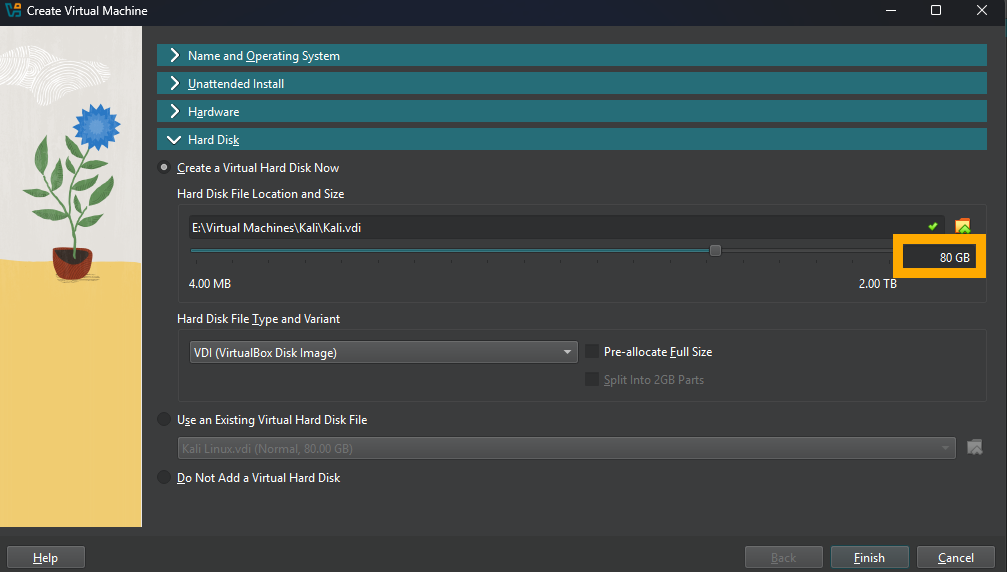
Do not make any modifications to “Hardware”, expand the “Hard Disk” menu and change the disk size from the default to 80GB, then press “Finish”.
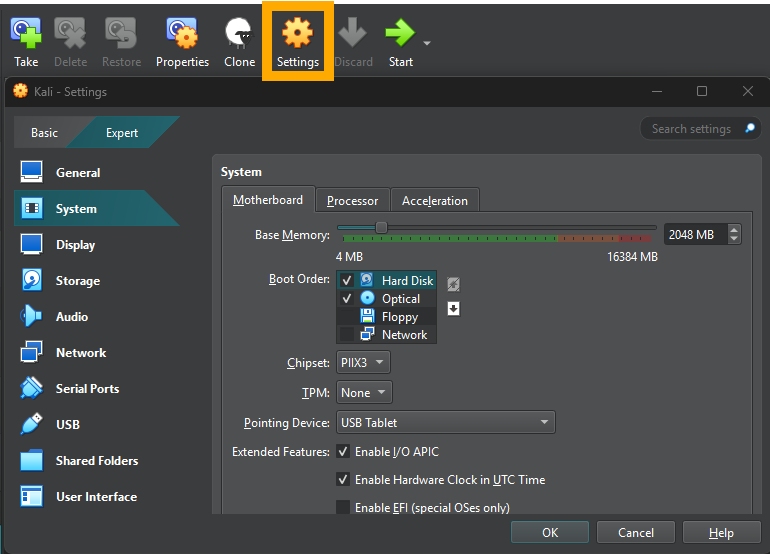
Once the machine is created, click on it and then click “Settings”. In “Settings”, navigate to “System” then “Motherboard”. Uncheck “Floppy”, and change the Boot Order to match the below:
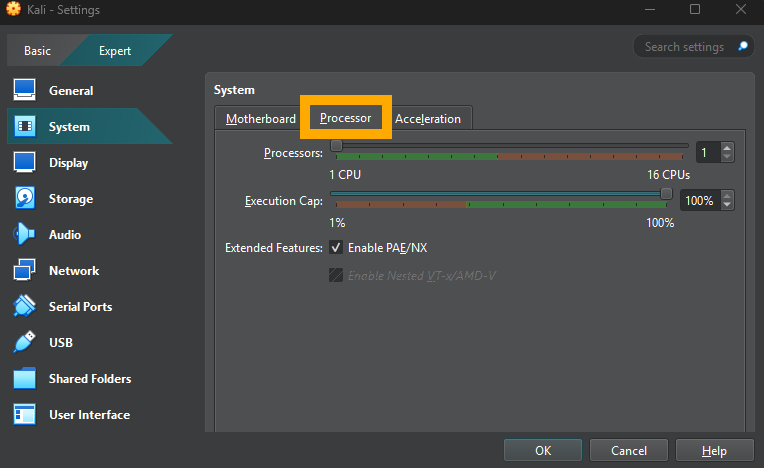
Next, select the “Processor” tab in the same menu, and check the box for “Enable PAE/NX”. PAE is Physical Address Extension, in short, this allows a the client OS to access more than 4GB of RAM by adding 4 bits to memory addresses, Kali requires this to be enabled. If you want to dive into this, check here.
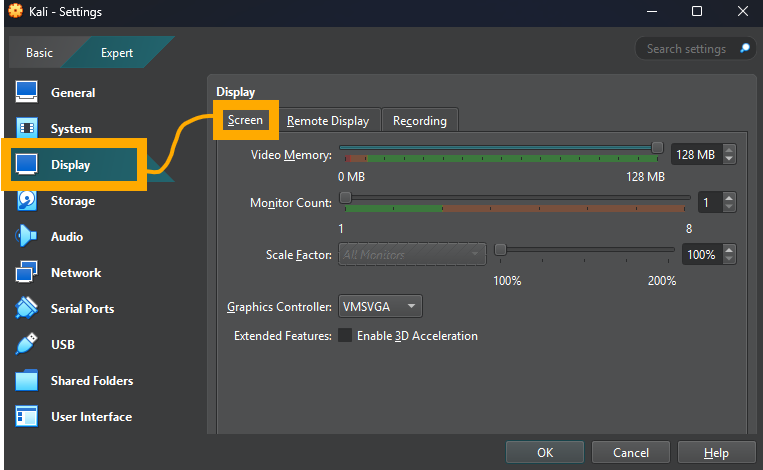
The final step in here (for now), is to click “Display” then “Screen”, and change the “Video Memory” slider to the max (128MB).
Done! Now press “OK” to confirm, and then hit “Start” in VirtualBox to power on the machine.
Kali System Setup
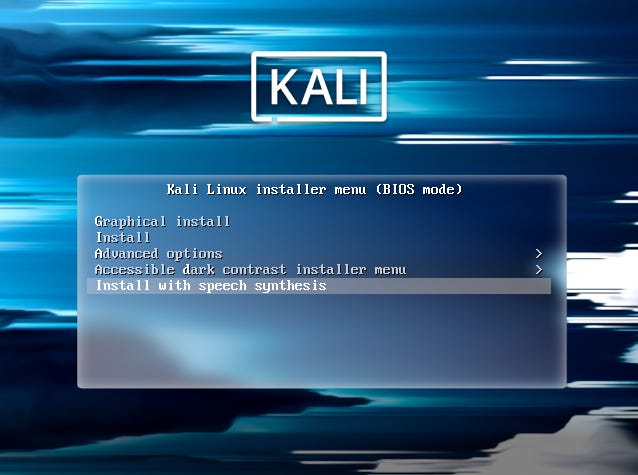
Once the machine boots, press “Enter” to choose the “Graphical Installation” option.
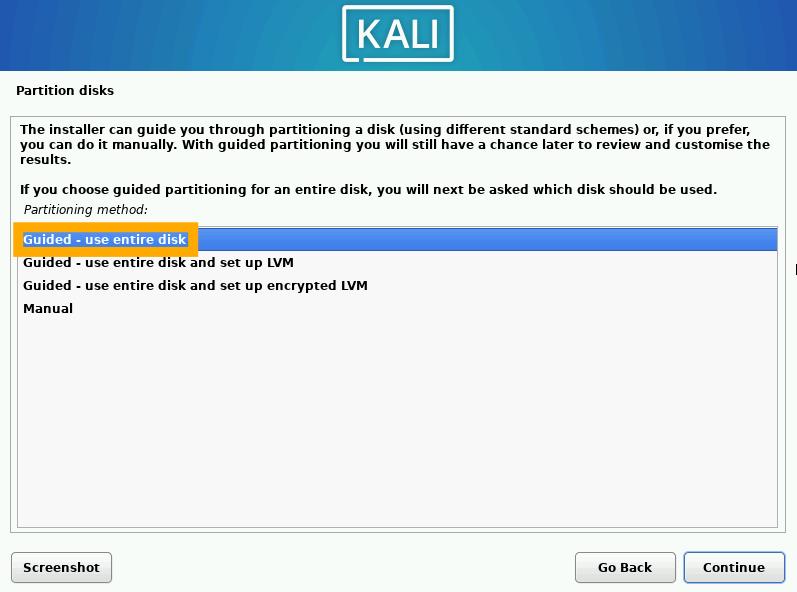
I won’t cover every step in the install here, because its very self-explanatory. If you do require full instructions, you can find the full Kali docs here. Follow through the steps presented, setting your location, keyboard type, username, password etc. Make sure you do not forget the password you use! Once you reach the “Disk Partition” stage, choose “Guided - use entire disk”.
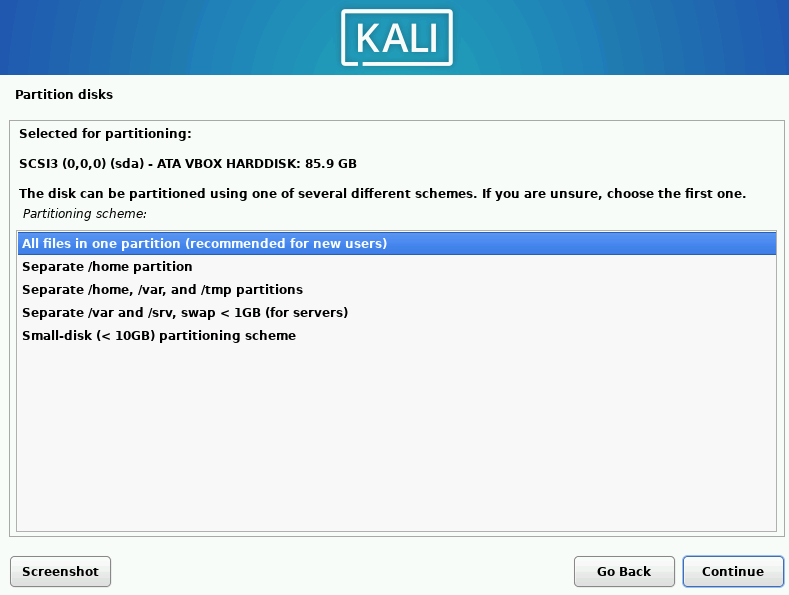
On the next screen, press “Continue” and then choose “All files in one partition (recommended for new users)”.
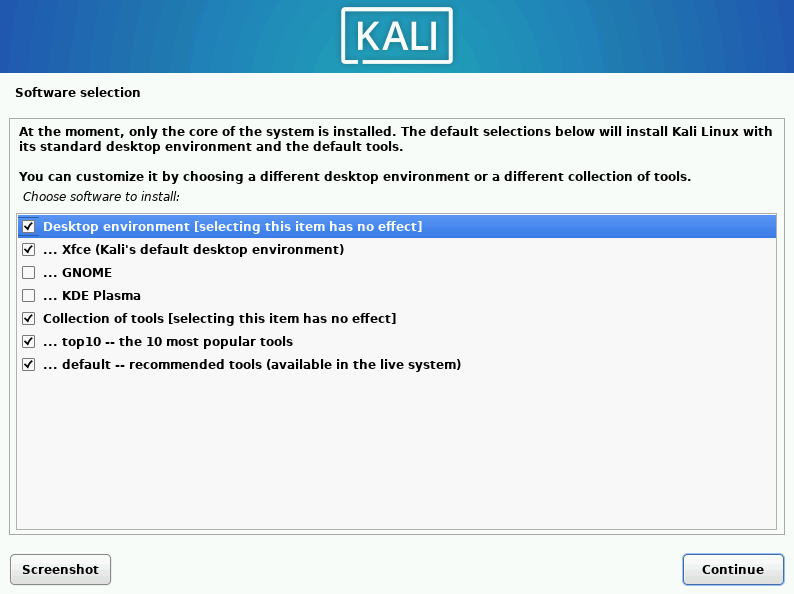
Press “Continue” and then “Continue” again on the confirmation screen. On the final screen asking “Write the changes to disks?” press “Yes” and then “Continue”. On the “Software Selection” screen you should leave everything as default. If you like, you can pick GNOME or KDE Plasma for your desktop environment instead of Xfce. Note that KDE plasma is a bit more intensive and should only be used if you can afford to run this machine at 2 cores & 4GB RAM.
After software install, you will be prompted to install the GRUB Boot Loader, choose “Yes” and select your drive in the next step. Finally, press “Continue” to boot into the new machine. Logon using the credentials you set during configuration. Kali installs the Guest Additions by default, after a minute or two pressing RCTRL+F should seamlessly fullscreen the VM. Note that RCTRL is the default host-key, if you have used VirtualBox before you may have changed this.
To complete configuration, open a terminal window and run:
sudo apt update && sudo apt full-upgrade
When these commands complete, the system will be fully up-to-date and ready to go. For now, power the VM down. In the next post, we’ll setup the firewall and link it to the management machine.